

How To Create A Mail Merge From Excel To Outlook
A mail merge is a fantastic way to save you time when you're emailing a large recipient list. Doing a mail merge in Word gives you all of the functionality of a mailing list, without the need to configure an expensive email platform. 🤯
Mail merge is typically used to send mass emails that have been personalized to their recipient (like replacing "Hello! 👋" with "Hey John!"). They can also save you time on tasks like mailing personalized letters, envelopes, and creating mailing labels.
This blog post will walk you through creating and sending a personalized mail merge step by step. To demonstrate, we'll send a cold outreach sales email to a list of leads.
A quick summary of how to send a mail merge from Excel:
- We start our mail merge from Excel by organizing the contact information of our leads in one document.
- In Word, we will draft our email message, planning specific personalizations that will cater each message to the individual recipient.
- Finally, we send the mail merge and an email is processed by Outlook to each contact from our list.
How to send a mail merge from Excel
Start with who. Who's on your mailing list? Who do you want to receive your message, and what information do you wish to personalize in it? The first step of the mail merge process is to create an excel spreadsheet that will act as our data source.
Your mail merge spreadsheet in 3 simple steps:
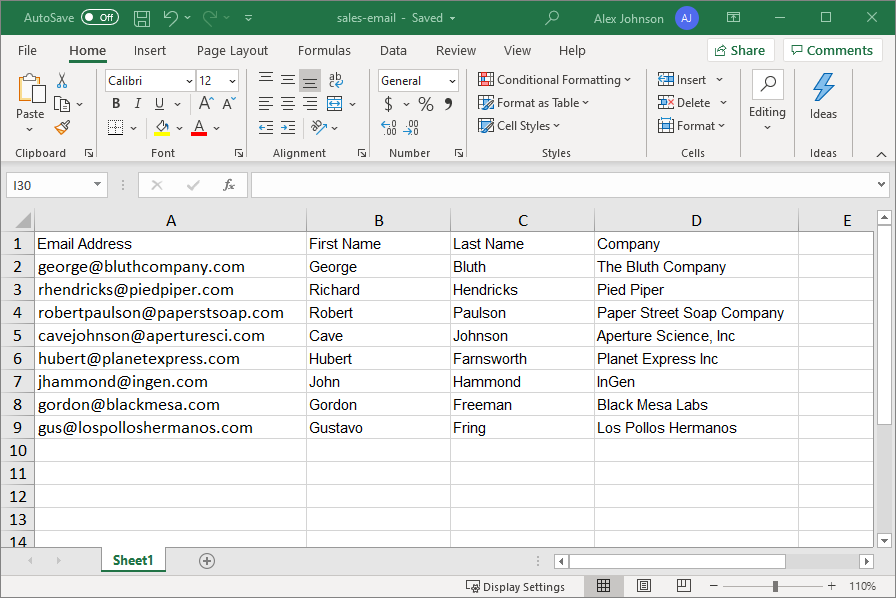
- Put the email addresses in the first column.
- Use separate columns for each data field you will insert into your personalized emails (be specific with your names as you'll use them again).
- Double-check everything for accuracy and ensure your contacts' personalized information and email addresses are accurate. Minor errors are easy to miss when you're working with bulk messages.
Part 1: Configure the data used to personalize your message
The most common personalization used in a mail merge is to include the recipient's name in the message greeting line. In our example, we're sending a cold outreach sales email, so we will also include the contact's company name.
Final step: Open the file menu and save your Excel document. We will return to it once we've configured our email and are ready to set up our email recipients.
Personalized fields will be formatted according to their selected data type in Excel in your email
Set cells to the appropriate format so currency fields, numbers with decimals, percentages, and zip codes show up correctly in your message.
Part 2: Draft your email template in a Microsoft Word document
Now that we have our mailing list together, it's time to put together our source document in Word. The best way to draft your message is to get started without worrying about your personalization fields. We will add them later. Focus on your email content first and foremost; the quality of your email will have the most significant impact on its success. Make sure to save when you're finished.

Start your mail merge in Word with two steps
Now it's time to connect our Word document to the recipient list in Excel and configure Word to personalize the message based on our contact data. Click the Mailings Tab to get started. If you don't see it, simply navigate to the Ribbon settings under the file menu and make sure the Mailings Tab is checked in the list of sections to include.
Step 1: Start your mail merge from the ribbon button by clicking 'start mail merge' and selecting 'Email Messages' from the pull-down list.
Step 2:
- Click 'Select Recipients' from the drop-down list to define our data source.
- Choose 'Use an Existing List…'.
- Select your Excel document from the file picker.
- When the system will show you the table selection dialog, select the appropriate sheet and data.
Note: If you're on Mac, a dialog box asks if you want to trust the Excel Workbook text converter, connecting your Excel spreadsheet to your Word Email. Approve it to continue.
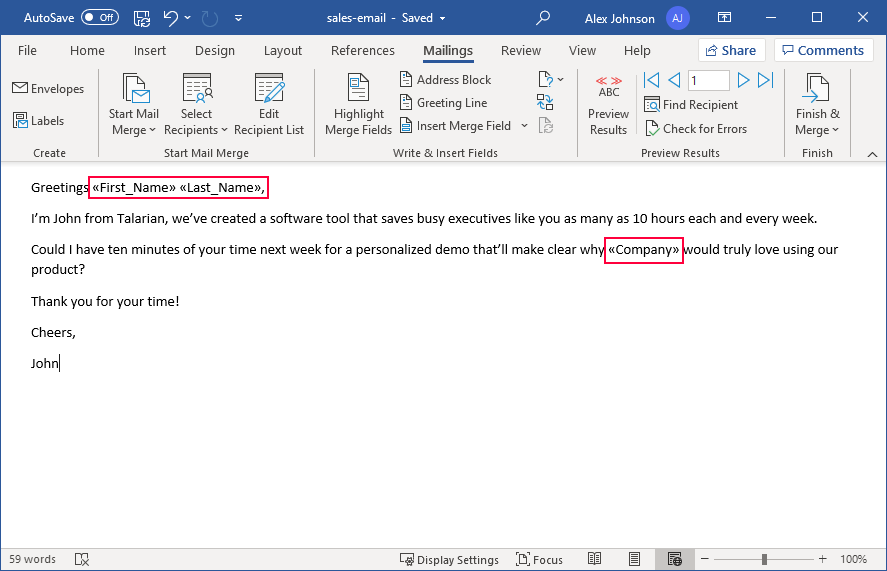
Insert personalization fields into your email template
Now it's time to swap out each of the fields in your email with the placeholder tags for the mail merge. When the mail merge runs, it will insert the corresponding value from your Excel file depending on who is receiving the email
- Select the text you'd like replaced
- Click 'Insert Merge Field' and select from the list of field names
- Repeat this process for each additional personalization field
In our example, we're replacing the first name, last name, and company.

When you're done, it should look like this:
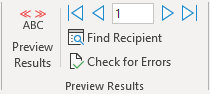
Optional Step: Preview every email your contacts will receive
Before we go any further, it's a good idea to check our work and make sure we haven't made any mistakes. Select the 'Preview Results' button to see an email exactly as your recipient will view it. Use the arrows to view from different recipients. You can even preview the email for a particularly important recipient by selecting 'Find recipient.'
Part 3: Sending your Mail Merge, Outlook
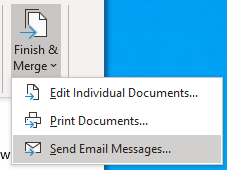
Almost there, time to send your emails! Click 'Finish & Merge' from the Word menu bar and select 'Send Email Messages' to open the recipients' dialog box.
Start by selecting the 'Email_Address' column for the 'To:' field. If you named your first column in your excel spreadsheet differently, select the appropriate value. Fill in the email subject, and select the desired email format.

Click OK. Office will take you to Microsoft Outlook, where each email will be automatically sent, temporarily appearing in your Outbox. At the same time, they are processed and sent to each recipient. And that's all it takes! Congrats! You've now successfully sent a personalized mass email campaign.
Tips, Tricks, and Further Reading
Mail Merge in Microsoft Office is a powerful tool on its own, but there are many ways to take things to the next level.
For advanced users of Microsoft Office, we recommend this video from Kevin Stratvert. In it, he provides an excellent overview of the different ways you can customize your merge in Excel, Word, and Outlook. Users might also want to refer to this list from Microsoft about other data sources you can use to merge beyond a simple spreadsheet.
Running a mail merge with Gmail
If you use Microsoft Excel and Word but also use a Gmail account, there are multiple ways to run a mail merge with Gmail. Click here to learn more.
Mail merge for Gmail - Yet Another Mail Merge - YAMM
Send mass emails with Gmail. Reach the primary inbox, not promotion tab or spam. Track results in real-time directly from Google Sheets
![]() Alex HolzSenior Product Specialist YouTube.Google
Alex HolzSenior Product Specialist YouTube.Google

How To Create A Mail Merge From Excel To Outlook
Source: https://yamm.com/blog/mail-merge-excel/
Posted by: ferrarogreggelf44.blogspot.com
0 Response to "How To Create A Mail Merge From Excel To Outlook"
Post a Comment